
I've always wanted to re-upholster chairs and finally decided to go for it. I picked up these sad looking chairs at a second hand store who had posted them on Craigslist for $20 each ( I bargained them down to $10 each).
 |
| Ooooo Girl, you need a make-over. |
And after all is said done, this is how they turned out!
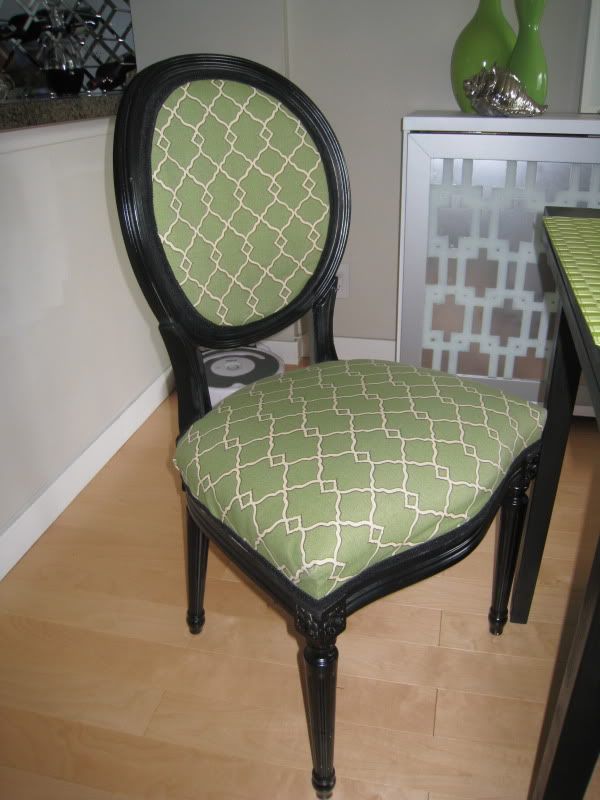 |
| Matchmaker, matchmaker make me a match |
 |
| Find me a find, catch me a catch! |
How did I do this, you ask? Well - here it goes:
Some things to remember when buying a chair to re-finish:
1) Condition
- Is it clean? You need to take a good hard look at the item to ensure that you're not going to bring home any critters (Bed bugs! EWWW! Wood worms? Hell no!) or mold. Seriously, get Sherlock Holmes on this sucker if you have to - bringing a magnifying glass couldn't hurt.
- Sturdiness - shake it around a bit, sit on it, tap it - if the seller won't let you do that then you don't want it. Check the wood - is it falling apart or decaying? If it's particle board or MDF, are there holes that where fiber seems to constantly chip off? PASS. If the legs are uneven, check to see if there are pieces missing and if they've done some shoddy repairs. If it's just the actual legs that are uneven and you don't see anything else wrong with them, you can always add adhesive pads underneath to even them out.
- Smell - If it smells and you're NOT going to remove ALL of the upholstery - PASS. Think about it - this is an old piece, it's smelly, it's been smelly and it's gonna be smelly long after you bought it.
- Will you be re-upholstering the chair by yourself or will you be hiring a professional to do it?
- Balloon chairs or Louis styled chairs are the easiest to reupholster because of their design. You may want to check and see if the cushion parts of the chair pops off - if so, these will be the easiest to re-upholster.
- Do some research on the type of material that you want. Material doesn't come
 cheap and you may be spending a lot more than you thought you'd be. Start collecting swatches before you buy your chair so that way you can bring them along when you're shopping. Get to know the fabric - pull on it from opposite ends - does it do funny things, like make odd creases? Does it have reflective qualities (satin finishes) that highlight flaws in the upholstery? When stretched, can you see through the fabric? Is there a pattern? You might need to get extra fabric since you'll want to line up the pattern so it's consistent.
What you'll need:
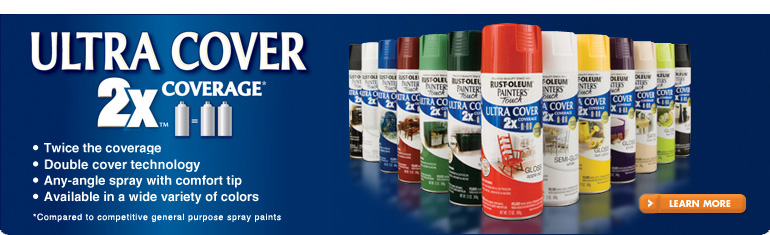
- Spray paint (about 2 - 3 cans, depending on what type you use. I used Krylon but Rustoleum/ Painters Touch (Ultra Cover) is my new favourite.
- Primer (2 - 3 cans)
- Sand paper
- Tack cloth (cloth with adhesive)
- Fabric glue
- Trim
- Fabric (I would buy 1 meter more than you need in case you need to start over again)
- Batting
Batting - Foam (if necessary)
- Linen or burlap
- TSP
- Staple gun
- Spray adhesive
- Large scissors
Preparing your Chair:
 | |||||
| Waverly Sun N Shade- Chippendale Fretwork Moss |
- Wash your fabric and put it in the dryer. I chose outdoor fabric because it is water and stain resistant. After removing it from the dryer make sure to iron it. Just because you'll be pulling the fabric tight doesn't mean that it will get rid of the wrinkles.
- Remove original upholstery, foam and batting (the last two, remove only if you are replacing them). Keep the original fabric so you can use it as a pattern for your new fabric.
- Sand the paint down, if necessary. You don't need to strip all the paint from the chair, you just have to make sure that the surface is smooth. I would use course sandpaper first and then go over it with fine sand paper. It makes for a nicer finish. Wipe the chair down with the tacky cloth to remove the dust.
- Clean the sucker with a damp cloth using hot water and TSP but don't soak the chair in water. Remember to wear gloves.
- Let the chair dry for at least 4 hours. The chair's shape will change once it's dry and you want to work on the chair in it's regular state. The last thing you want is to work on it wet, have it look perfect at that time, then look at it the next day and see that your fabric is puckering or pulling.
- So you've come this far... might as well keep going!
Paint the Chair
- Now that you've prepped your chair, it's time to paint.
- Spray the area with primer. Stand about a foot away or else the paint won't go on evenly and it will drip. Yes, it will look like a hot mess.
- It should dry within an hour. Repeat for the second coat.
- Spray surface with your paint. Allow 1 hour or so to dry. Repeat for the second coat.
- If you would like to protect the surface or prefer an ultra glossy finish, spray the surface with one coat of epoxy.
Covering the Chair
- Luckily, the chairs that I had purchased had been recently re-cushioned and didn't have any smells. But I did want to add some more batting to create a firmer seat.
- Remove the seat. There are usually screws and it's fairly easy to do with a screw driver. If the screws are old and rusty, it's better to replace them because now that you've removed them, they are vulnerable to future breakage.
- Using chalk, mark an F for the front of the seat and a B for the bottom of the seat.
- Grab that old stinky fabric. Trace the shape of the old fabric on your batting, linen or burlap and fabric so that you have about 5 inches of fabric (the linen or burlap goes on top of the batting and the fabric goes on top of the linen or burlap) and batting to fold over the actual cushion.
 |
| Order of the upholstery materials |
- (Why do we need linen/ burlap AND fabric? Well, the batting isn't smooth and depending on the type of fabric you chose, the bumps might show through. When you put linen/ burlap over between the two it creates an even surface).
- You will need to alter the pattern because the fabric gets a bit too thick and bulky since it gathers when you start stapling. When cutting the V's into the fabric, make sure you don't cut too close to the blue line. I'd leave about a centimeter space from the V's and the blue line:
- Spray the surface of the cushion with spray adhesive. Make sure to cover your work surface because this stuff is a pain to get off (won't likely come off, actually).
- Place the batting on the cushion and hold it there for a minute or two.
- Repeat step 5 and 6 with the linen or burlap. Use new gloves if you have gotten adhesive on your current gloves. If it gets on your fabric it won't come off.
- Repeat step 5 and 6 with your fabric. Use new gloves if necessary.
- Flip the cushion over. Grab the extra fabric and secure it to the back of the cushion with staples from your staple gun. I'd staple every 1.5 inches.
- Make sure to pull firmly. However, if you pull too tightly, the fabric might rip when someone sits on it. I know, tricky. Once you're done, you may want to grab a pair of scissors and trim the extra fabric off. I would suggest leaving at least an inch of extra fabric.
- Okay... looking good so far? Place the cushion back on the chair and screw it back into place.
- I added trim on the border of my cushion and preferred using fabric glue or wood glue as opposed to the glue gun. I found that the glue gun often dried too fast and would the trim would get beads of dried glue underneath.
- I treated the surface with some stain guard. I used 3M Scotch Guard Protector for Fabric and Upholstery.
 |
| Here's a picture to illustrate what I mean. |
Viola! - you got yourself some new chairs. If you have some pics that you would like to share from your DIY chair project I'd love to see 'em!
HTML Comment Box is loading comments...
You are so talented! Keep on keepin on!
ReplyDeleteThanks! More DIY postings to come!
ReplyDeleteThey look awesome, and what a great tutorial!
ReplyDelete